Scenes are a really effective way to communicate information to other players. There are a few things to keep in mind for a great experience for yourself and those around you.
With scenes, you can
Communicate a mood or feeling for a scenario
Convey information as a stand in for in-world signs.
Represent an object or item that would not normally be present due to game mechanics.
However, you shouldn't
Spam scenes with low effort or “useless” information.
Block interaction points (3rd-eye spots, etc) with scenes
Place or block scenes above other scenes
Scenes should always add to a scenario or setting and help push the story or information to those who need it.
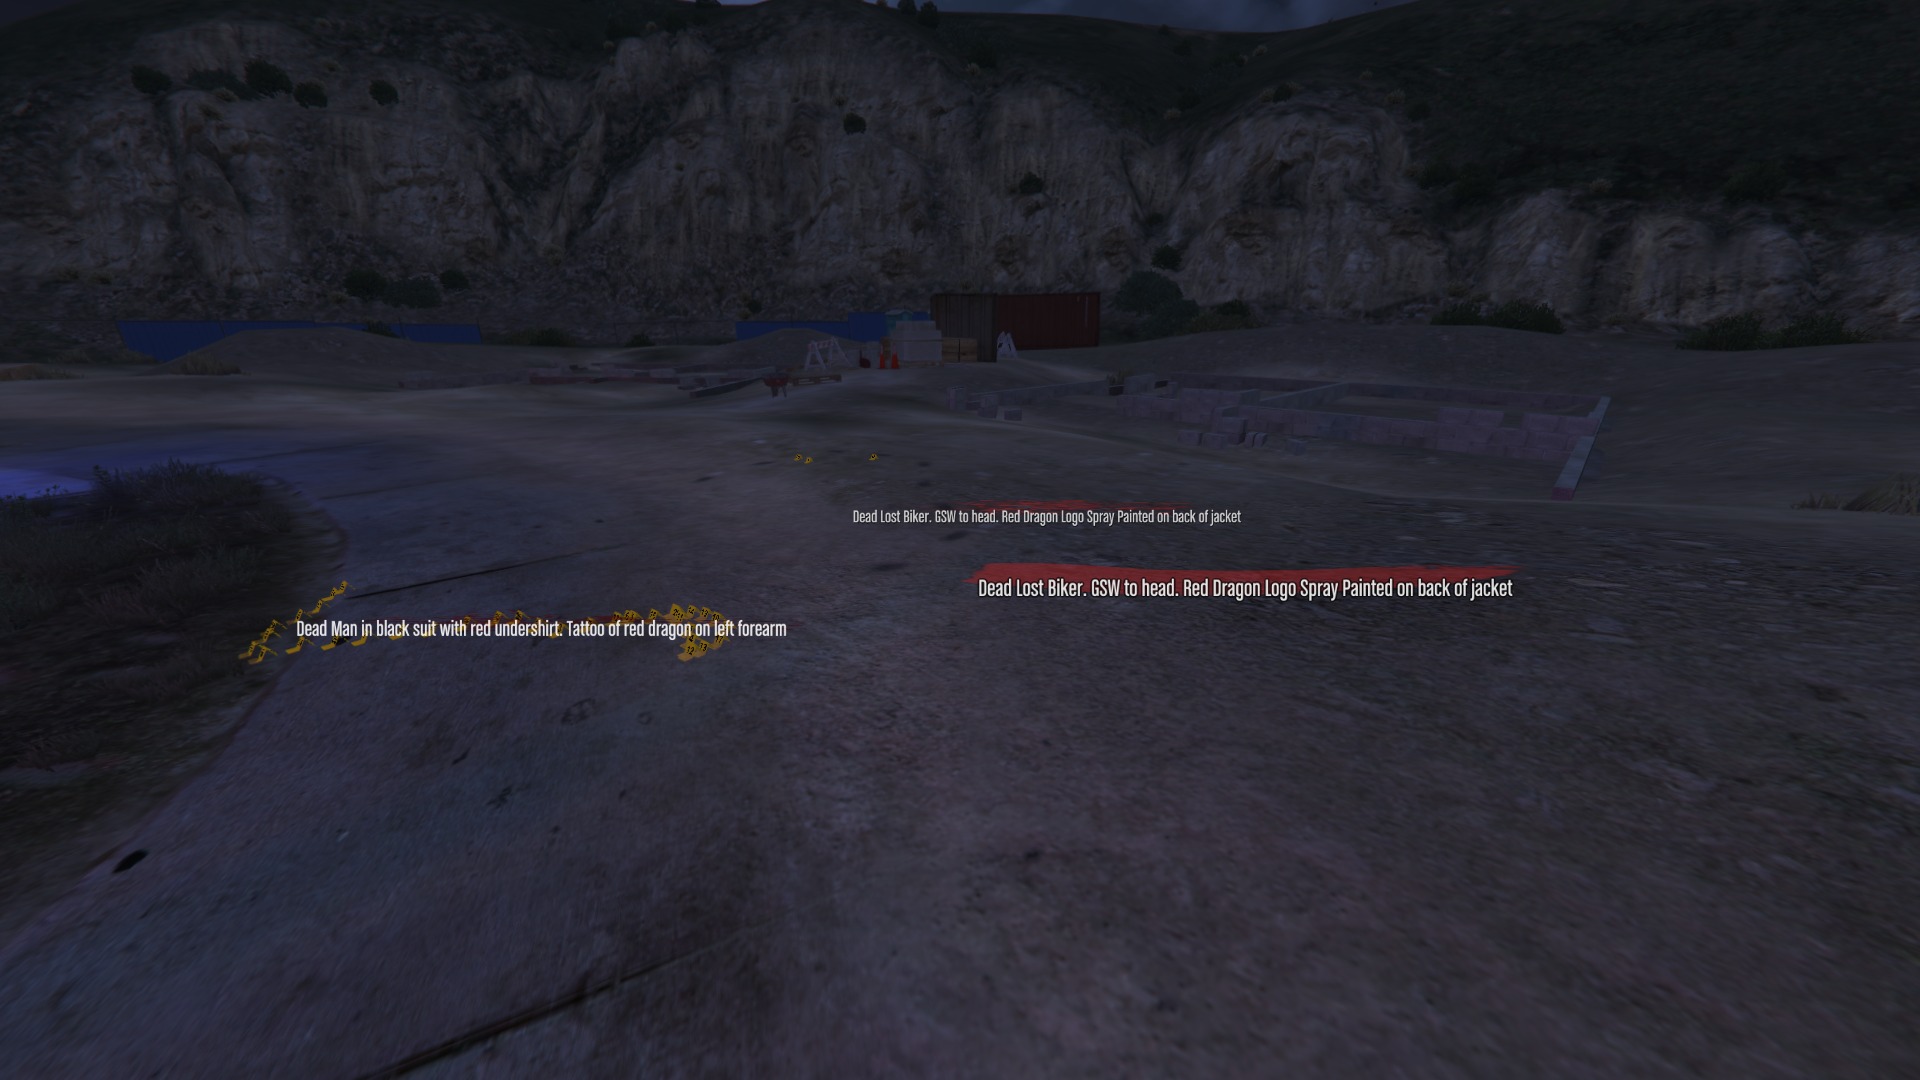
Scenes placed at a scene to set the stage for police who responded.
Start by looking at the general spot you'd like to place a scene in and open your chat box (default T) and start typing /scene.
You will see the hint appear, and you can type out the content for your scene into the box. e.g.: /scene You see blood on the floor leading down the hall. You can also add extra formatting to your scene to include colors, line breaks and other fun details to your scene. See the Formatting Your Scene section for more details.
From there, you can hit enter and a menu will appear. This menu will allow you to change several things before placing the scene. You will also see a preview of the scene as well as a blue dot showing the exact anchor point for the scene. You can move your mouse around and adjust the placement of the scene to your liking.
A few interesting features on the menu:
Select Font: You can choose between 4 different fonts depending on your preference.
Text size is the font size of the sign. This does not scale the background as well, so you'll need to adjust that to fit.
Text Outline controls the thickness of the text's outline. This can help it be more visible on different backgrounds
Background sets the shape of the background. There are several different kinds, and variants for different needs.
Sleek (1-3): Simple boxes with a top & bottom border with varying heights.
Simple: Just a plain box
Blood (1-5): Various blood splatter type shapes. These work well colored.
Brush: Paint brush stroke
Chain (1x) and Metal (2x): Various chain and metal textures.
Gradient (1-4): Boxes that fade out on the edges with varying intensity
Noise: A splotchy/TV static-like texture.
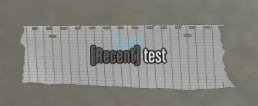
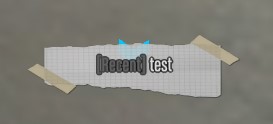
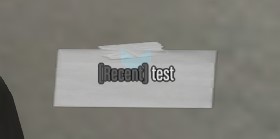
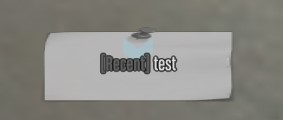
Note (1-5): Various “note/paper” like textures.
For the NOTE textures, It is recommended to use white and max opacity (255) for the texture details to appear
Note 1
Note 2
Note 3
Note 5
Background width and height are not tied to the size of the content, so you may need to set these to make it all fit.
Background color is important to make sure your text is visible over the surroundings and some background look better with color applied.
Background Opacity is as important as color. The higher the number, the more solid (less see-through) the background is. This helps visibility.
Background X and Y:
X is the horizontal position relative to the text,
Y is the vertical position relative to the text.
As you change the size of the background and text, you may need to adjust the position so that the background remains where you want it.
Background rotation allows you to spin the background.
Scene Duration: How long the scene is to remain. It's not recommended to leave a scene for too long unless there is an RP reason.
Avoid using the 730 hour scene duration unless it is meant to be a more permanent fixture.
Things like gang tagging, crime scene scenes, etc should be 72 hour maximum.
Show Scene Duration: Showing scene duration is useful if you want someone to know how old a scene is. Like a crime scene. Otherwise, if it's just a notice or a more 'permanent' fixture, set it to “No” to make the scene look cleaner.
Viewable Distance: How far away from the scene a person is before they can see it. The lower the number, the closer to the scene you have to be.
Interact Function: This pulls up a menu to give you the choice of setting an emote that can play when someone interacts with your scene, or a /me that shows up as though they emoted it.
Presets allows you to save a scene to re-use it later. This also saves the text of the scene. Useful if you are re-using the same scene over and over.
Once you are satisfied with your scene, hit the E key to save the scene. Once you've saved it, you cannot adjust the content again without removing it and adding a new one.
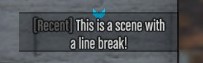
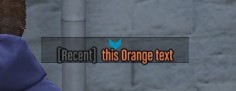
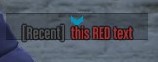
Scene text can be customized in a few different ways to enhance the look and feel for a particular purpose. This includes emojis, colors, line breaks and other text features.
To format text, you can insert special tags as you type.
~n~ Line break - Forces text to a new line
~h~ Makes text bold
~o~ Orange Text
~r~ Red text
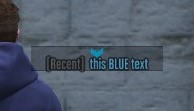
~b~ Blue text
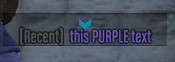
~p~ Purple text
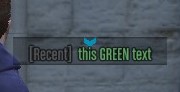
~g~ Green text
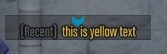
~y~ Yellow text
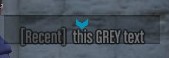
~c~ Grey Text
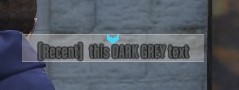
~m~ Dark Grey text
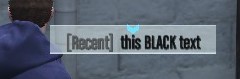
~u~ Black Text
~s~ Resets text formatting back to default (White)
Note that if you change a color, you need to change it back to white ~s~ after that word, or the color will continue until it hits another color marker.
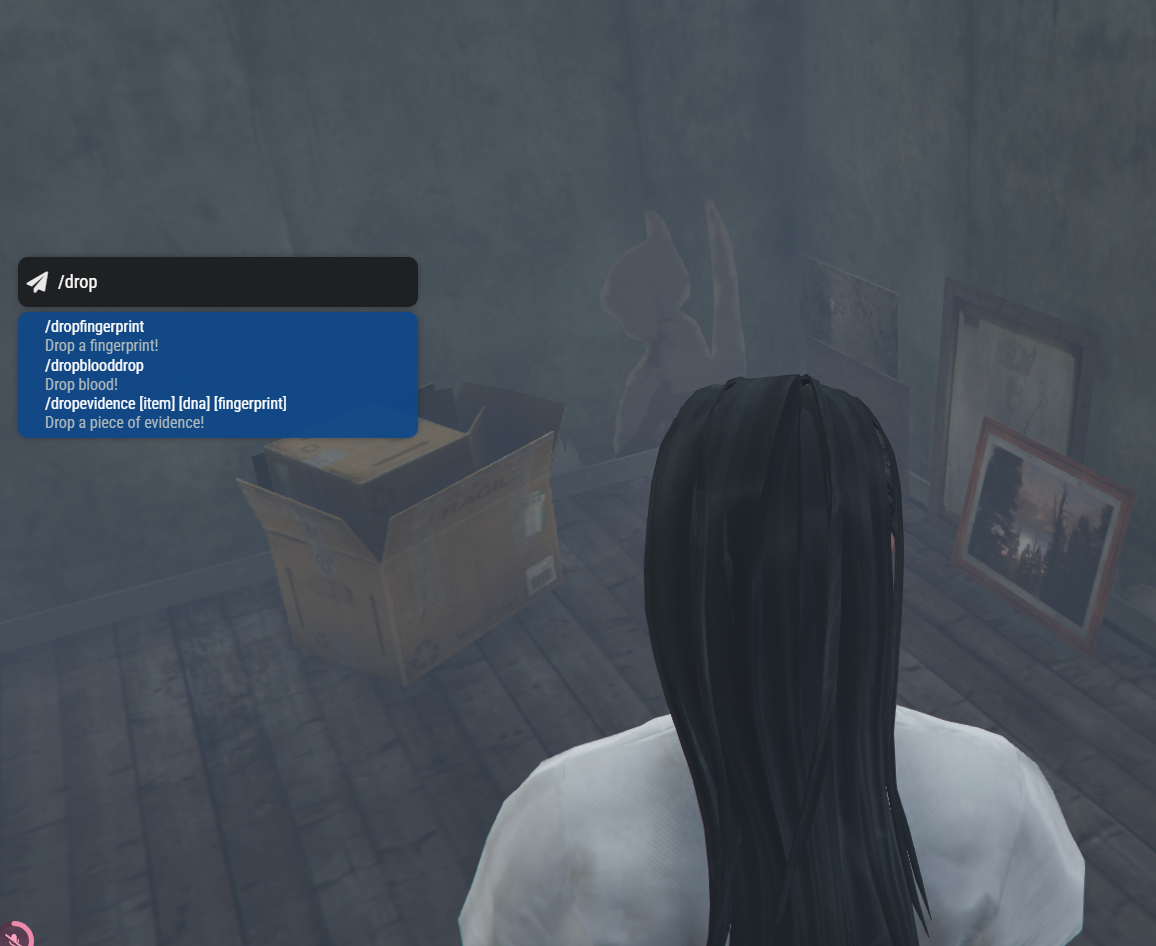
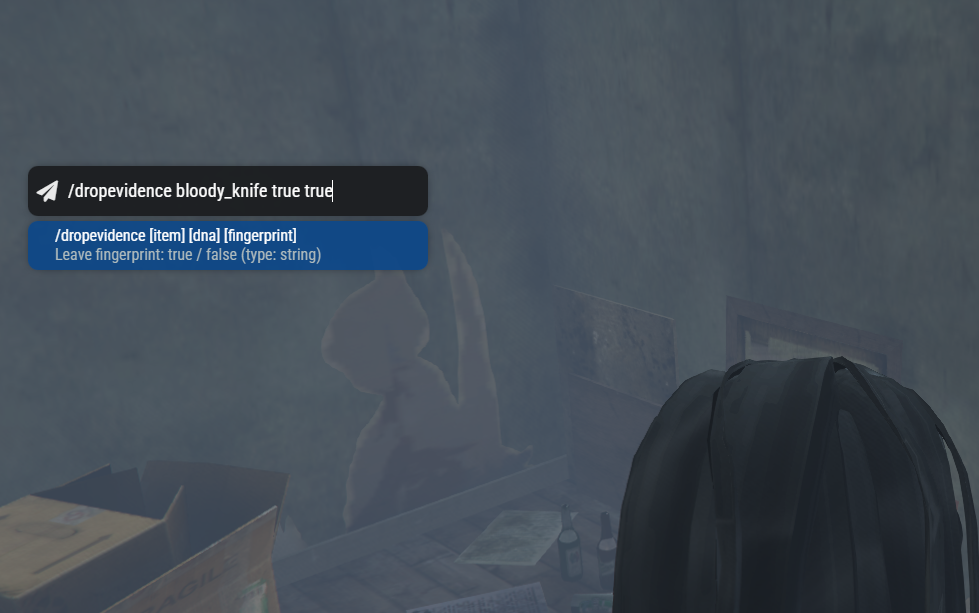
Sometimes, when you are wanting a grander story and more police involvement, you are able to place specific evidence that links to your character for law enforcement to find and analyze.
fingerprints [/dropfingerprint] : these are your character's fingerprints
blood [/dropblooddrop]: these are your character's blood
evidence [/dropevidence]: these are items that you can drop. When dropping an item, you can connect fingerprints or DNA to it, associated with you. If the item being dropped has multiple words, use and underscore to separate words.